A Drift Car Setup Guide for Drift Enthusiasts
Share This Page
Building a drift car starts with a RWD platform and adds a welded differential or a limited-slip differential (LSD), a hydraulic handbrake, increased steering angle (angle kit) and a stiffened chassis; at race level, a roll cage and a five-point harness are also mandatory. So it's really a ton of modifications, but each one serves a clear purpose. In this article, I'll explain what each part does, the order in which they're installed, how D1 Grand Prix and Formula Drift cars differ, and what budgets this job requires in Türkiye - all of it. If you're ready, recline your seat, we're going.
Highlights
- The three pillars of a drift setup: welded differential, hydraulic handbrake and plenty of steering angle
- In advanced setups, steering lock can reach 50-65 degrees can reach
- In D1 cars, minimum weight including driver and equipment is 1,000 kg
- Beginner build: roughly $5,000-10,000; mid-level: $15,000-25,000
- Drifting on public roads in Türkiye leads to fines of up to 165,000-220,000 TL leading to penalties of up to
How is a drift car built? A story that begins with the friendship of two wheels
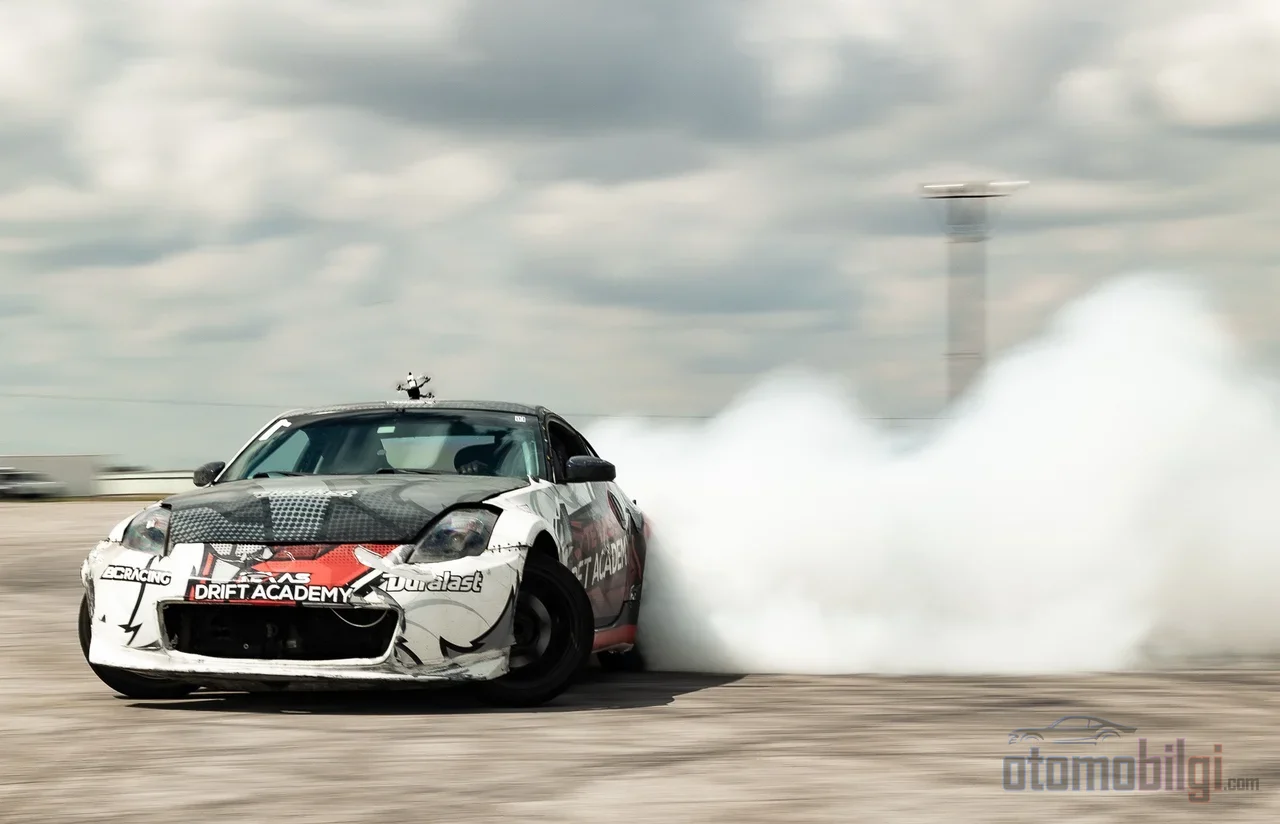
First, let's understand the basic philosophy: Drifting is a dance in which the rear tires deliberately lose grip while the front tires steer the car. To do this consistently, the rear of the car must slide easily while the front maintains constant control. As drift schools in Texas also emphasize, there is a trio of building blocks: a welded differential, a hydraulic handbrake and sufficient steering angle. Add a solid RWD platform and an adjustable suspension, and the skeleton of a car capable of drifting is complete.
But the other side of the coin is this: there's no building everything in one night. Good setups progress gradually, and the car's capability grows in parallel with the driver's. Starting with too much power and too many parts will most likely end with the car slammed into a wall. Trust me, this story always ends the same way.
Differential: Welded or LSD? That's the real debate
The rear differential is the mechanism that determines how power is distributed to the two rear wheels. On a normal road, that's a beautiful thing; in drifting, we want exactly the opposite: both wheels spinning together. An LSD (limited-slip differential) does exactly that - it locks the wheels together, distributes power equally, and makes the drift predictable. Think of it this way: instead of pressing equally on both pedals of a bicycle, if one side spun freely, you wouldn't gain speed. The LSD guarantees equal pressure at the rear.
There's a cheaper and wilder alternative: the welded differential. This solution mechanically rivets the two wheels together and works just fine for drifting in low-power vehicles. When power is low, locking the wheels is easy, no problem. But as power increases and control expectations rise, adjustable clutch-type LSDs come to the fore; in these, the locking behavior can be tuned with parameters such as acceleration, coast and preload.
Which one, in which situation?
- Beginner, low-power car: a welded differential is a practical and economical solution.
- Drivers looking for high power and predictability: an adjustable LSD is preferred.
- Racing regulations: most series accept locked or LSD differentials; details vary according to the rulebook.
There is no definitive consensus on this within the community; at low power an open differential is sufficient, while it is generally accepted that an LSD significantly improves drivability at high power. So the answer is not a single sentence: it changes depending on the car's power and the level you are aiming for.
Steering angle (angle kit): the secret of maintaining control while sliding in a corner
When drifting, the wheels lock far beyond their normal limits. With factory settings, a car gives you perhaps around 35 degrees of steering lock - for drift angles, this is often not enough. This is where the angle kit comes into play.
The most economical solution is the small parts called rack spacers; in some cases, these provide approximately 10 degrees of extra angle. If you want to go one step further, with knuckle adapters or reinforced knuckle parts, 50-65 degrees of lock can be achieved. But be careful: as the angle grows, new problems arise. At high locking angles, the front lower control arms and upper arms must be adjustable; this is essential both for mechanical clearance and for camber and caster adjustment. In other words, adding angle is not a single-part purchase, but a chain of improvements.
Hydraulic handbrake: the guarantee of consistent lockup
A classic handbrake is like pulling a lever not designed for drifting - sometimes it grabs, sometimes it doesn't. A hydraulic handbrake, on the other hand, is a hydraulic pump connected to the middle of the rear brake circuit that acts only on the rear wheels. The result: consistent, predictable lockup with every pull. This tool, used to initiate rear slide when entering a drift, is considered the key to reliable control on the track.
There are two approaches to installation: placing the hydraulic brake in the middle of the existing rear brake circuit (inline setup) or giving it its own circuit. If you prefer its own circuit, you need to add a second pair of calipers to that axle - cost and labor increase, but the feel of the hydraulic brake stays pure. An inline setup is common in a starter build, while a separate circuit is a frequent choice in race-focused cars.
Chassis, clutch, brakes: the safety and durability layer
A car that will continuously put its engine power down must also be rigid enough to carry that load. At this point, a weld-in roll cage does two jobs at once: collision safety and high torsional strength. When the body becomes stiffer, suspension settings also become more predictable. There is also a technical side: in racing regulations, modifications to the chassis for roll cage clearances (such as notching) may require prior written approval.
What do the racing rules say?
- The FIA Motor Sport Games DC1 technical regulation mandates two diagonal elements on the main roll bar.
- Not SCCHA, but SCCA: for racing experience, a minimum six mounting point roll cage is required.
- On the Formula Drift side, a five-point harness system is mandatory.
Clutch and brakes are an open-ended topic: if you plan to use the clutch-kick technique constantly, a standard clutch wears out quickly, so a set of durable clutch assemblies is essential. The same logic applies to brakes; if rear lockup consistency deteriorates, all the advantages of the hydro handbrake go up in smoke.
From Touge to D1 and Formula Drift: How do build levels differ?
A quick history break: Drifting became popular in Japan in the 1970s. Rural mountain roads are called "touge" (), and in 1960s-70s Japan, this underground culture took shape amid the post-war automotive boom. The origins of drifting are usually attributed to former motorcycle racer Kunimitsu Takahashi; he used this technique to improve tire temperature and grip in corners. The technique later evolved into a style and a culture.
The first professional drifting series came in 2001 with the D1 Grand Prix. D1 imposes stricter rules on vehicle modifications and determines the winner based on the flair of competitive drifting. In D1 cars, the minimum weight, including driver and equipment, is 1,000 kg ; there are no weight or engine displacement classes. Formula Drift stands out with its higher tempo; in 2026 even the qualifying format changed - about 80% of the score is now automatically generated from line and angle telemetry, with the remaining 20% left to judges' evaluation as driving style. This change also sparked debate in the community; some are asking how digital scoring will affect the spirit of the format. In Drift Masters in 2026, the total is calculated out of 100, with the Lead score worth at most 60 and the Chase score at most 40 . Beginner, intermediate and advanced builds: the MX-5 example
Let's go through a popular example to make this concrete:
Mazda MX-5 . Light, cheap, balanced, and with a wide range of aftermarket parts - a classic choice for drifting. But due to its short wheelbase it is prone to oversteering; in the same budget range, the BMW E36/46 offers a more stable platform. Through the MX-5, the three levels look like this: Level
| Goal | Key parts | Beginner |
|---|---|---|
| Street-legal, reversible, economical | Coilovers, rack spacer, rear camber arms | Intermediate |
| Still registered but drift-focused | Knuckle adapters, adjustable LCAs, hydraulic handbrake | Advanced |
| Stripped, track-only, competition spec | 50-65 degrees of lock, roll cage, backwards entry capability | If you've noticed, the logic is always the same: grow the car along with the driver. Excess power or over-modification while learning speeds you up and then stops you. Drifting is not a power contest; it is an art of control. |
Building a drift car in Türkiye: Budget and realities
Now let's get to my favorite part: money. How much does an amateur drift build cost in Türkiye? Dollar-based tiers give a healthier idea: for beginners, an entry-level build is around
5,000-10,000 $ , while an intermediate build is 15,000-25,000 $ $15,000-25,000 or so. Turkish sources also circulate dated figures like "an average drift car costs around 60,000 TL"; in the face of inflation, you need to account for the possibility that such TL figures may have lost their relevance. The most honest approach is to divide your budget into tiers in dollar terms and calculate part prices based on the exchange rate of that day.
And one harsh reality: finding a suitable place to drift. Drifting on public roads in Türkiye results in serious administrative fines - for example, a driver and vehicle owner caught drifting in Esenyurt were given a total of 220,000 TL in fines, and a driver in Ordu was fined 165,000 TL . So once your build is finished, your direction should be closed tracks and official organizations; both legally and in terms of safety, this is the only legitimate path. Events organized by TOSFED and similar federation bodies are the safest environment for learning to drift.
In closing: Build progressively, learn with control
Building a drift car is not a shopping list, it's a process. Start with the differential, continue with the hydraulic handbrake, increase steering angle as your needs grow; commit to the chassis and safety once your track goals become clear. You can go for an advanced build on a car you'll only use on the track, but it's smarter to keep a street-driven car reversible. And remember: even the world's best setup remains just a pile of parts in the hands of a driver who can't feel the control. So which platform would you start this journey with - an agile MX-5 or a stable E36? I'm waiting in the comments.
Sources
- How to Build a Reliable Drift Car (Checklist + Budget Guide)
- The Ultimate Guide to Building a Mazda MX-5 Drift Car
- Drift Car Building - Everything You Need To Know
- Hydraulic Handbrakes for Rally, Rallycross, and Drift Cars
- How to install the hydraulic handbrake?
- Drift Handbrake Setup Guide for Reliable Lock
- FIA Technical Regulations for DC1 Drift Vehicles
- Race Experience - Vehicle Requirements - SCCA
- PRO/AM Safety Regulations - Formula Drift Rulebook
- How a Professionally Fitted Roll Cage Improves Chassis Rigidity
- Drifting (motorsport) - Wikipedia
- What's D1 Grand Prix - D1GP Official
- D1GP vs Formula Drift: Judging, Cars and Format Compared
- The story of drifting's Japanese roots
- 2026 Formula Drift PRO Technical Regulations
- Formula Drift announces major 2026 competition format changes
- Drift Masters 2026 Judging Rules
- How to Build a Drift Car
- Owning a Drift Car on a Low Budget
- STEP'S BIG TUNING GUIDE